Thursday, July 31, 2014

Group development

For my group (Alicia, Jamie, Cheryl), we planned to do a newsletter on Interior Design because all of us love its clean and large pictures concept. We got so excited searching for the photos! Our target audience would be working adults, families and really anyone who is interested in interior design and want inspiration. For the whole newsletter, it'll just show the different types of houses such as industrial, rustic, modern and grand. I chose Industrial interior design because I absolutely love its metallic and spacious design.


(http://www.interiordesign.net/media/photos/67941-May-2014-Cover.png)
(http://www.interiordesign.net/media/photos/60240-April-2014-Cover.png)
(http://www.pdfmagaz.in/wp-content/uploads/2014/03/23/interior-design-magazine-february-2014/Interior-Design-Magazine-February-2014.jpg)
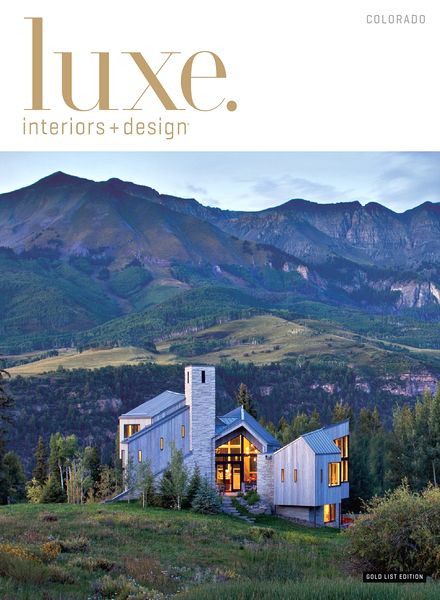
(http://www.pdfmagaz.in/wp-content/uploads/2014/03/21/luxe-interior-design-magazine-colorado-edition-winter-2014/Luxe-Interior-+-Design-Magazine-Colorado-Edition-Winter-2014.jpg)

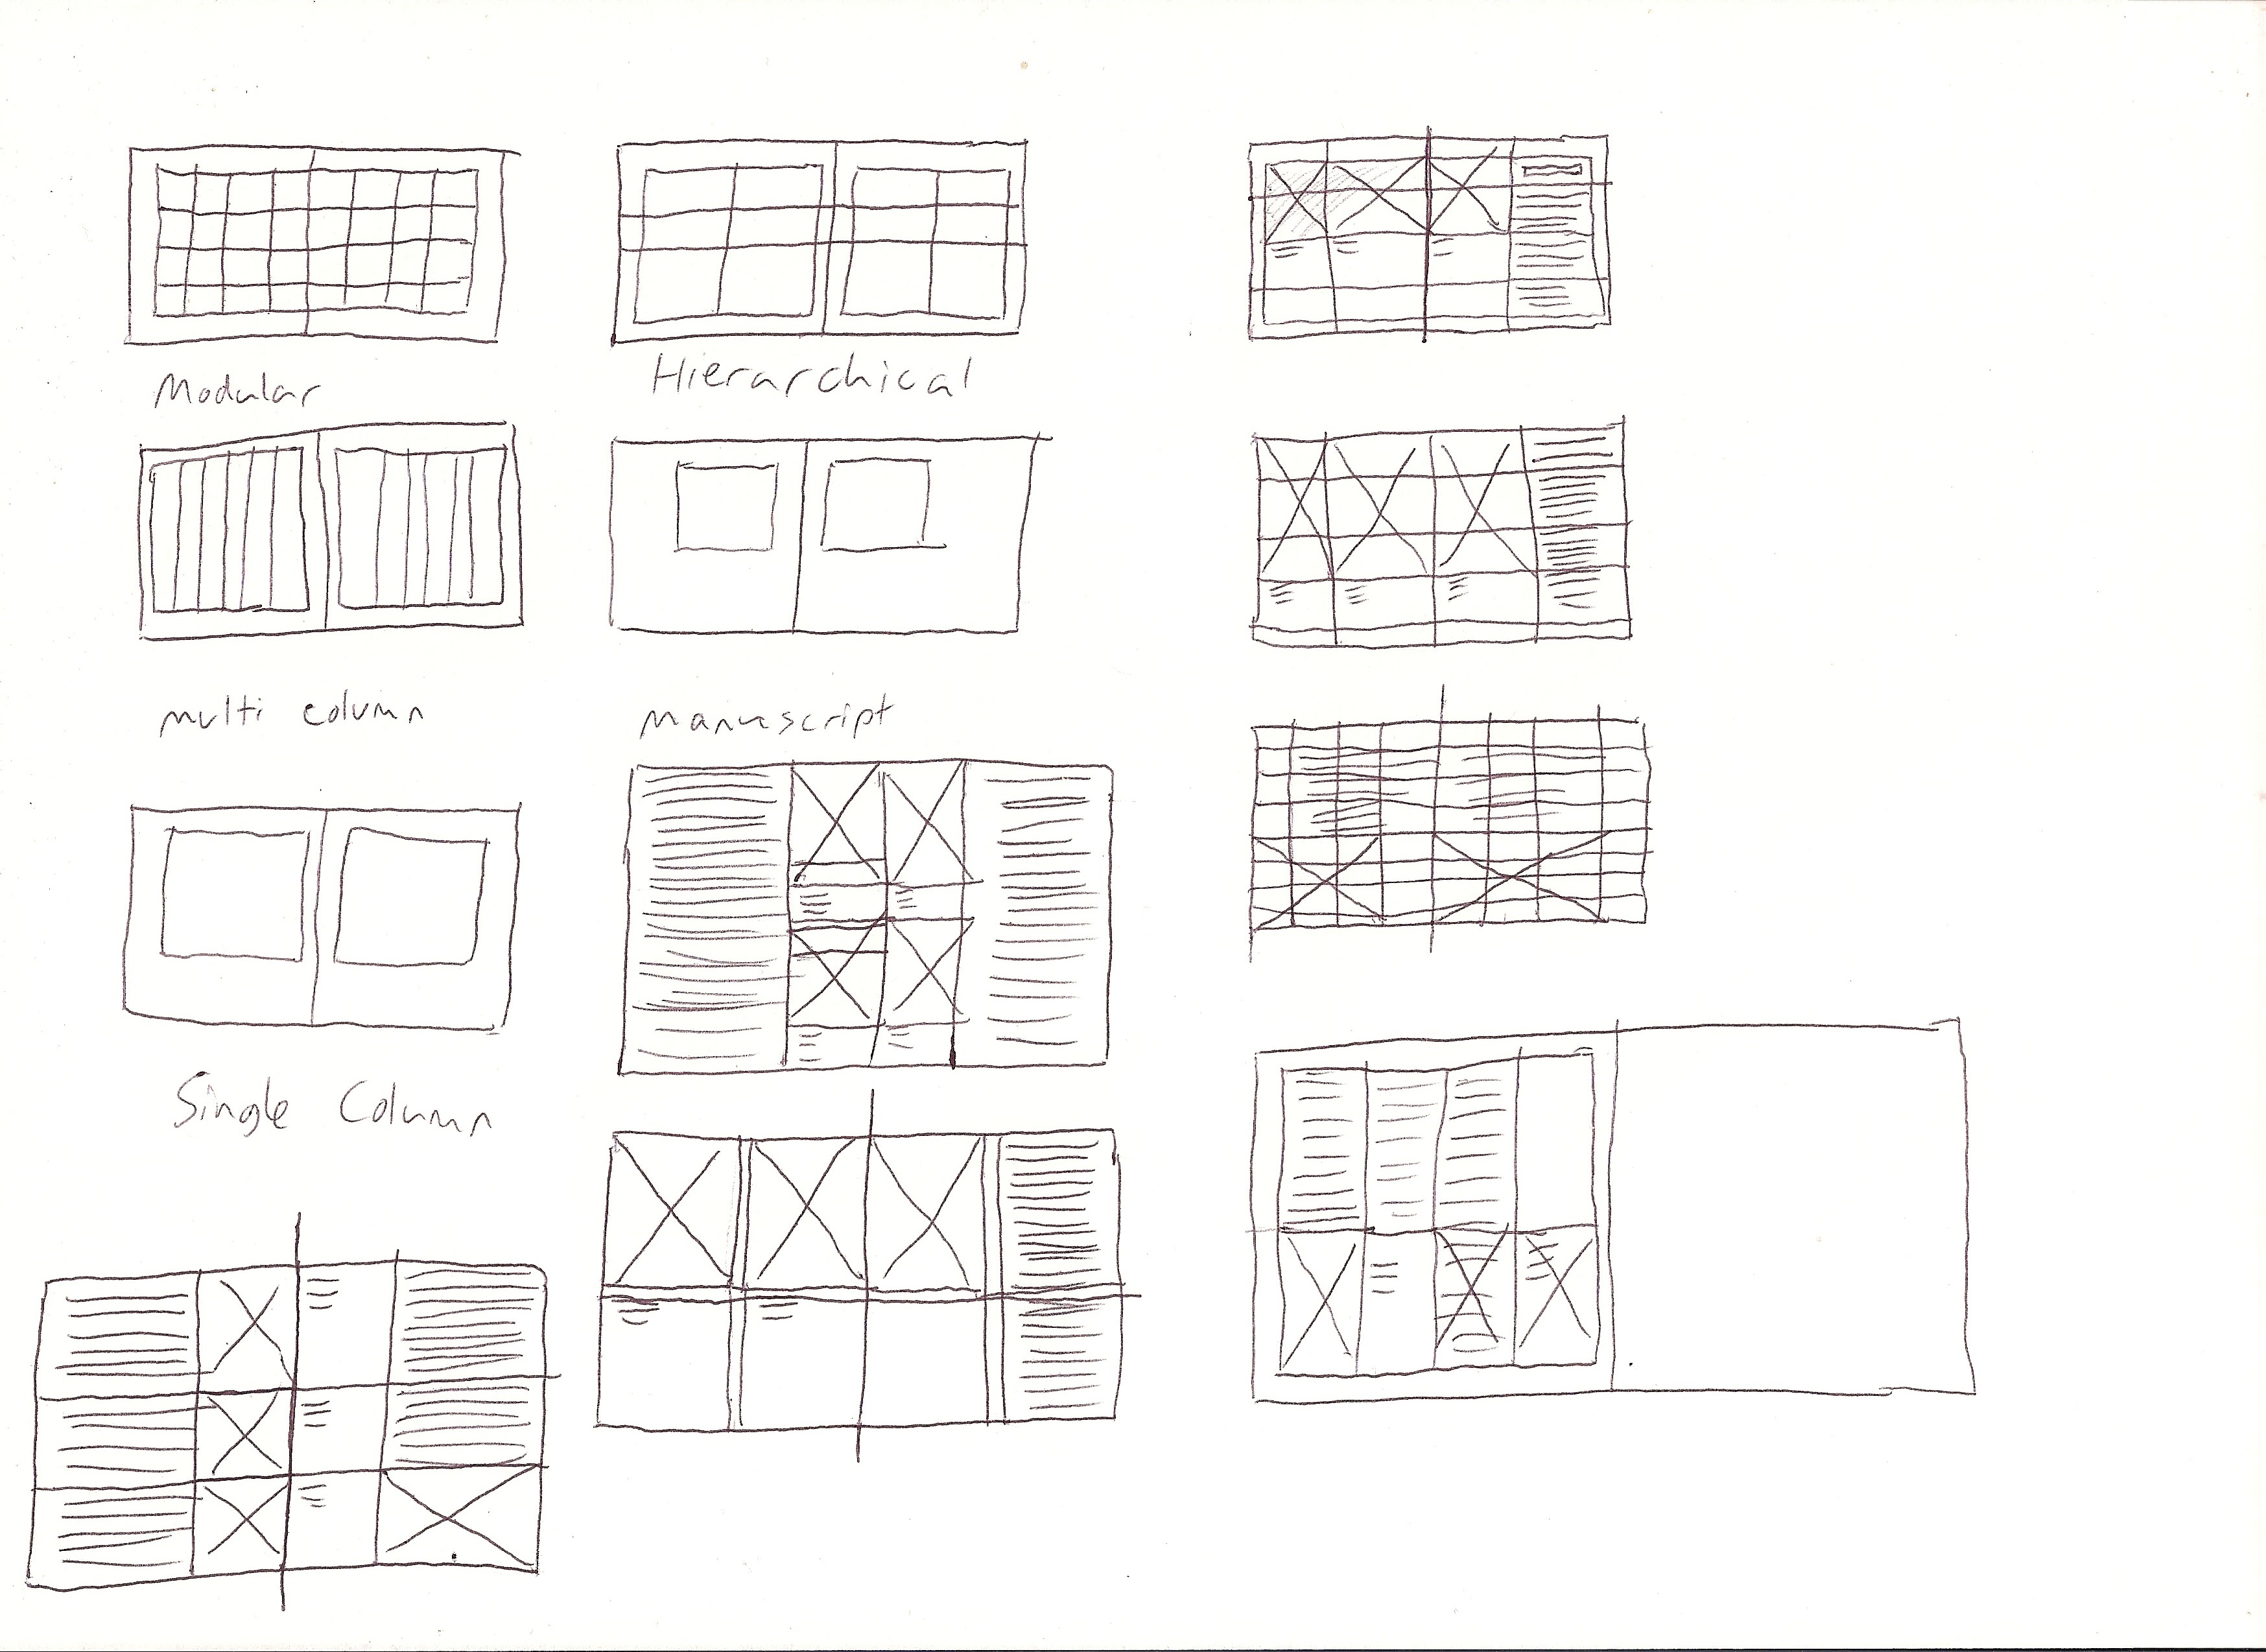
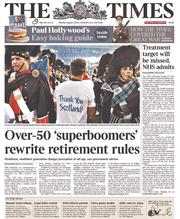
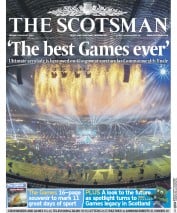
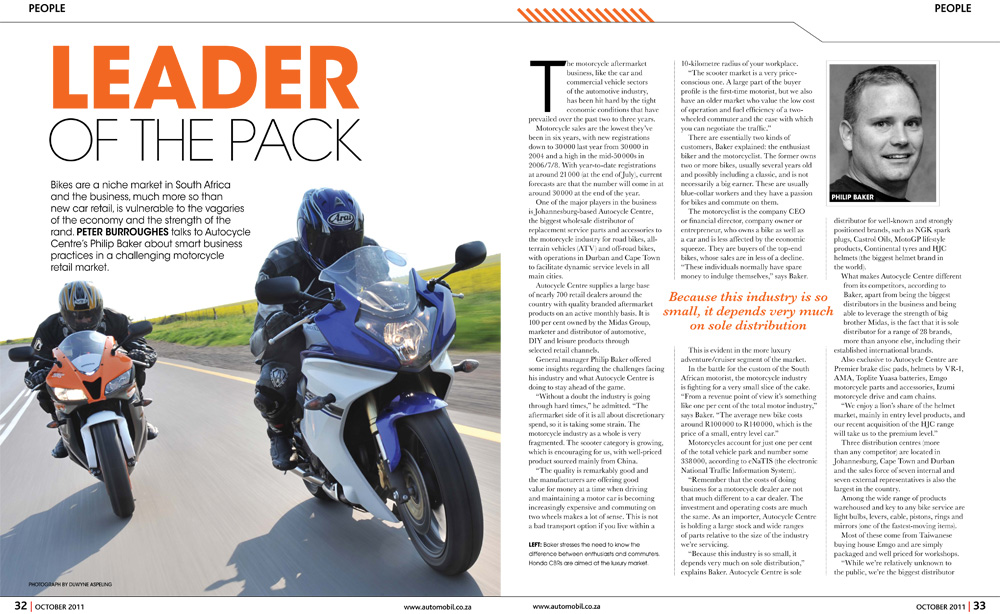
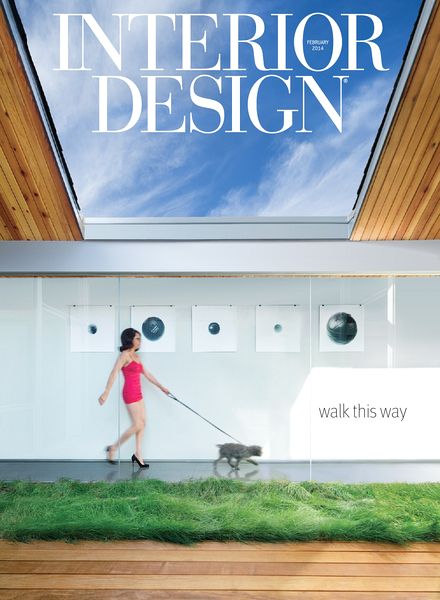
Before sketching our grids and layout, we wanted to find inspiration from other magazine designs hence we researched online for our own pages. Once we find our favourite designs, we compare which layout is the best and use that design as a guide. 

For me, I find these layouts so amazing!

  
(http://inspirationhut.net/inspiration/modern-magazine-re-design-transworld-surf/)

(http://inspirationhut.net/inspiration/42-excellent-examples-of-magazine-layout-design-for-your-inspiration/)


(http://inspirationhut.net/inspiration/30-more-stunning-magazine-and-publication-layout-inspiration/)

My favourites are:


(http://inspirationhut.net/inspiration/60-beautifully-modern-and-inspirational-magazine-book-layouts/)

I absolutely love the colours and how they arrange the pictures, fonts used and many more! It's so beautiful, I hope I am able to re-create something as similar as this for my own pages :D

Saturday, July 26, 2014

Creating Book Files

It was a short lesson that day because I only learnt how to package every page together to create a book file. This is extremely important for my group newsletter assignment to be submitted in this format. 

A book file is a collection of documents that share styles, swatches, master pages, and other items. It makes everything easy as I only have to number the pages, print or export to PDF.

The style source is one of the documents added to a book file. It is the first document in the book and a new style can be selected at any time. The specified styles and swatches replace those in other booked documents when synchronized.

(https://cdn.tutsplus.com/vector/uploads/legacy/tuts/000_2010/323_indesign_style_using_book/Tutorial_inDesign_Book_05)

First off, create a new book. The panel, which is the working area (where you add, remove, or rearrange documents), appears and the file is saved with the file name “.indb” extension. Next up, just add documents to the book file. It is really simple to add the document. Cick the plus button at the bottom of the book, select the InDesign files and just open it. I can also conveniently drag the files onto the panel. If needed, I can change the order of the documents by dragging them up or down in the list, making it easy for me.

(http://www.edensart.com/assets/images_computer_articles/full/zen_id_book_palette_full.jpg)

It is also isn't that difficult to manage the book file. Each book file has its own tab. The icons in the panel indicate a document's current status: open, missing (document moved, renamed, deleted), modified (being edited) or in use. For closed documents, no icon will appear next to it. 

Finally, when saving a book file, I must take note that InDesign only saves the changes to the book and not the documents individually in the book.

For my group assignment, we need to export the book to PDF file. To do this, just choose Export Book To PDF in the Book panel menu. To create a PDF of the documents, select them and choose Export Selected Documents To PDF

(http://indesignsecrets.com/wp-content/uploads/2010/08/exportpdfinteractive.png)

Instead of Interactive PDF, I must be aware that it should be Print PDF instead.

Now that I know how to create and save book files in the format I need, I can submit the assignment with no worries!

Thursday, July 24, 2014

Style Sheets

The first part of the tutorial was a brief lesson on style sheets; the basics. The steps were straightforward but it is time-consuming and a lot of work. Despite all of that, it has its wonderful benefits. Style sheets are basically recorded format that I can use in my design. It is already prepared. It helps a designer as there's no need to apply the same type of formatting manually again and again. For example, I can have all my titles with the same font, size and colour because I have already recorded all this information. I can apply them with a single click. It works out perfectly.


The formats are already decided in advance for different text and objects. Using these style sheets is definitely a quick and effective way to manage formatting. I learnt that there are two ways to create style sheets.
1) Format text until I obtained the design I like. To create the style sheet, I will use text as a template.
2) Open the style sheet palette and create style which can be applied to pieces of text
Nevertheless, formatting text using style sheets is a two-step process no matter the approach. Firstly, create the style sheet then apply to the text.

Here are the different types of style sheets:
- Character styles: Font, strokes and fills, leading, kerning
- Paragraph styles: Controls character and paragraph attributes such as tabs, indents and spacing, paragraph rules and hyphenation.
- Object styles - Strokes and fills, text wraps and effects. They can also contain paragraph styles for text frames.
- Cell styles: Table cell attributes such as text strokes and fills.
- Table styles: Cell styles spacing and strokes and fills


At first, I thought the style sheets were unncessary because I can just change whatever whenever I want to. I totally changed mind when I understood why and how it works. It makes formatting so much easier and I'm glad I learn about this! Below is what I did for this lesson :D


For the second part of the lesson, I was given a simple exercise to re-create two pages of a book. It was easy to understand so I had no problems in doing this :) 
These are the pages:


Sunday, July 20, 2014

Type on path tool + Image in text

On this tutorial lesson, I did the same steps to re-creating a poster except there are two additional things I learnt: typing on a path tool and image in text effect.

Typing on the path tool was simple, all I had to do was draw a line using the pen tool and just type on it! Due to the line (which can be of any shape), the text will just follow. I find that really cool and will absolutely used it in my future designs.

Image in text effect was really interesting too! As I was doing this, I was really excited *laughs* It was a bit confusing at first when I first heard of it but then I found out how easy it actually is. Just type something, preferably using a font that is big and bold such as Impact > create outlines (take note to click on direct selection tool) > prepare the image and cut it > select the outlined text > paste into > DONE. (If I'm not wrong, haha!)

This is the poster I re-created:


Next, I had to re-create a difficult poster of Shakira. The first time I saw the poster, I thought 'Whoa, how do I do that!'. I knew how to do a few parts but some were quite confusing. At last, here is the completed result. I did my best!

Friday, July 18, 2014

Editorial Design

I learn more on editorial design in this lesson! It was really confusing for me at first because I didn't quite understand the systems well enough. Now, after many explanations from my friends and tutor, I finally understand how to use it! Below is a sketch of a few grid systems I found online:

(http://samlaverycdf.files.wordpress.com/2011/11/scanned-image1.jpeg)


There are a few simple steps to designing a grid system from scratch. First step is to simply start with a blank canvas of A4 size. Next is subdividing ratios. The simplest grid system would be the modular grid.

(http://dav31d.files.wordpress.com/2012/03/multicolumn-grid.jpg)

To achieve something like that, I have to use a ratio of 1:1414 based on continuous division of the paper size. Elements within the design will have a relationship to one another by using the size as a guide. This is definitely one of the easiest ways to create a balanced grid. By simply layering division by division, the grid is slowly built as shown below.

Many have complained how grid systems stops the growth of creativity but the grids are actually facilitating creativity by providing a framework and answering designers frequently asked questions such as "how wide should the measurement be" and so on. A well designed grid can answer these questions without a doubt. 
The grid is finally done so now I can begin to experiment with type areas, shapes and composition. Based on the pages my newsletter will have, I can explore how the type and image will work together.


So, these steps are to create a basic modular grid system. Moving on, I learnt the steps of creating a more complex grid such as the Star Diagram.

(http://pamwright99.files.wordpress.com/2012/05/goldensectiona4spread.png)

Unlike the modular grid, this grid is applied to a double paged spread instead of a single page. This is also known as an asymmetrical grid as opposed to the symmetrical grid in the beginning. For this grid, the ratio of the page is used to define the main text, content or area of the pages. The content area is divided by using the Golden Section ratio. 

When the columns are done, creating the system is the next step. To flesh out the grid to allow it to cope with various content and page types, extending the lines of the content area and columns will do the trick. Then, just apply a horizontal rule cutting across the content area creation lines which gives the reader a line to rest their eyes on page after page. By using the extended lines, now it is possible to add areas for the access structure of the book which typically sit outside of the content area with plenty of white space around them. 


Finally, add the various designs to the grid with a reassuring thought that all individual elements of the design (text, images, etc) will have a relationship to each other.

Therefore, creating grid systems these way, despite confusing and time-consuming, ensures a balanced grid. But, the grid can always be played around with to make it exciting and fun. 

Sunday, July 13, 2014

Presentation

We didn't learn anything for this lesson! It was all just presenting our magazine advertisement designs. Here is what my ad looks like:


I was really nervous to present this because I was afraid of what my classmates and tutor would think of it but I guess it turned out alright!

My favourite ads from my classmates would definitely be:
Iliyas' Happy Socks. I think he did an amazing job with illustrator and photoshop! 
Alicia's rayban sunglasses. It was a really fun and cool ad!
Daryl's Nike ad. The different personalities concept was really good, I really like the simplicity of it.
Tanya's pencil colours. It was so natural and simple, I can see the ad being used in real life!
The rest of my classmates did a great job too, we all had put in so much efffort in the end and I'm glad we made it through :)

Friday, July 11, 2014

Designing Newsletters and Newspapers

In this tutorial, I learnt about the different ways to design a newsletter and newspaper. I find this very interesting because all the designs are so attractive! I wonder how designers are so creative to design such fantastic layouts.

For any newspaper or newsletter, it is important to grab the reader's attention hence the first page must be appealing. Loud headlines, huge photos, juicy and interesting stories and a good amount of splashy and bright colours would help attract people to buy the newsletters. Below are some examples!

         
(http://www.thepaperboy.com/uk/front-pages.cfm)


(http://inspirationhut.net/inspiration/42-excellent-examples-of-magazine-layout-design-for-your-inspiration/)

Besides that, there are also different types of photos and its guidelines. Horizontal, vertical and square are the 3 basic shapes of photos. Horizontal is the most common because we view the world horizontally with our own eyes. Vertical is complex to design but it is definitely more powerful and dynamic. The most boring would be the square so it is best to avoid this. Nonetheless, I shouldn't focus so much on the shapes as the content of the photo is the most important after all.


The layout on the right is indisputably better than the left one due to the different sizes and shapes of photos. The photos are all of the same sizes on the left layout which makes it simple and boring. I must also take note to give photos priority. The dominant photo will be the biggest among other competing photos to show its importance.

There are also some photo guidelines I should follow:
1) Every photo should have a clean, clear centre of interest
As a good photo is similar to a well written story, it should be easy to read and free of clutter. The important elements can stand out instantly if the photos are focused and cleanly composed.
2) Should look natural
In a professional snapshots, people are relaxed and natural as they engage in activities unlike amateur shots where they smile stiffly at the camera. It is best to shoot people doing real things, not acting to be busy or daydreaming.
3) Should get a cutline
Everything in the photo such as faces, places and activities, should be identified because readers might not know who is who or that they actually want to read the story. Avoid cutting out half of a person's face and cropped it out nicely.
4) Should be bordered
Framing each photo with a thin border doesn't allow white tones of the photo to float into the whiteness of a page.
5) Should be relevant
Photos are not to decorate the page but it is actually to provide information relating to the article.
6) Every face should be at least the size of a ten cent coin
Shooting crowds are not a good way if I want an image with impact. I should take shots of individuals instead.

Furthermore, cropping photos allows re-framing the image and creating a new shape that emphasize the importance. 

(http://www.digitalbirdphotography.com/photoshop/fundamentals/crop.jpg)

These pictures below are examples of how cropping can change the whole, original story. Wow, this is very unique and creative. It is an advertisement that will surely make a huge impact to people.

 
(http://creativecriminals.com/bbc/see-both-sides-of-the-story)


What else?
There are also more things that I can add besides text and pictures to accompany the story to make it more visually interesting and appealing.

- Graphs
- Fast facts
- Quotes
- Ratings
- Timelines
- Step-by-step guides
- Infographics
- Maps

For the second part of the lesson, I worked in a group with Alicia, Jamie and Cheryl for our newsletter assignment! We planned on our topic and theme for the newsletter which is Interior Design! We chose this topic because we all find it very interesting and it'll be fun to create it on InDesign. I'm a bit nervous because I'm still not that good with InDesign but I will practice daily to achieve great results!

During our discussion time, we briefly learnt about Editorial Grid Systems. There are three different basic types of grids which are the manuscript,column and modular grids. At the end of the lesson, we were given examples of the grid layouts and we found it very helpful.

We will definitely research online for more inspiration!

Sunday, July 6, 2014

InDesign

I finally learnt how to use Adobe InDesign in this lesson. I think it is very interesting that I get to create my own layout design. Here are some examples:


(http://www.carolinacongdon.com/images/everybody_big.jpg)
(http://kellyannryan.files.wordpress.com/2012/09/automobil-layout.jpg)
(http://iansagabaen.com/wp-content/uploads/2013/06/indesign.jpg)
(https://awoo08.files.wordpress.com/2012/04/picture-2.png)

But it's also quite difficult for me to remember all the tools because this is the very first time I've used it and I'm not familiar with it at all. Like photoshop and illustrator, all it takes is practice so I'll definitely practice on indesign to improve.

During this time I was given a task to recreate a Ducky newsletter. After I create a new document, I must remember to take note of the different presets such as page size, orientation, columns, margins, bleed, slugs and more. All of these are actually really important to make sure the layout looks good. For example, there must be a bleed it is so that the typography doesnt bleed to the edge of the page.

Along the way of learning indesign, I found out the best thing about it is the various tools for typography. Just by dragging the text box and without letting go, I was able to increase or decrease the number of columns by pressing on the right or left arrows. The placeholder text was also really cool because I finally understand how designers does it! I have always seen a weird german language in sample books and now I found out it's really just random. The use of the character palette is great due to its different settings.

I also learnt to place a picture and detect its white edges using clipping path! It saves so much time rather than going photoshop to cut off the edge. The Wrap tool is a really fun feature because of the cool effect. After saving the completed layout, I must always remember to package everything so that it can be sent to printing without any problems.

Here is the complete look:


The next layout I had to recreate on my own is a step up from the first. For this one, I had to use photoshop or illustrator for the image and incorporate it into indesign. I had to paint an MRT train using pen tool in illustrator. It was simple to figure it out but the skill can be improved :') I saved the file and placed it in the indesign layout. The rest of the steps were the same as the first one! There are definitely a few mistakes I spotted and I will learn from it and will do a better job next time :)

Thursday, July 3, 2014

Newsletter Design Basics

Now that my assignment 2 is done, I'm to my next project which is a group project. For this lesson, I moved on to a new topic which is newsletter designs. I learnt what I need to know to design a print layout. There are four basic rules: Consistency matters, use the right tools, know the fundamentals and know your audience.

Rule #1: CoNsIstEnCy MaTtErS
When I start a page, the next page must be similar in either colours, theme, fonts and more. It shouldn't be extremely different that it would look like it doesn't belong together. For example, these two pages doesn't fit each other at all.

            
(http://www.youthedesigner.com/wp-content/uploads/2012/07/edwin-murray-01.jpg)
(http://www.lpcprinting.com/images/newsletter-printing-large.jpg)

Rule #2: Use the right tools
Only by using the right tools, will I be able to create a nice design. The best case would be using Adobe InDesign as the layout, photoshop to edit the pictures and illustrator for vectors. 

(http://www.vapartners.ca/wp-content/uploads/2011/04/Adobe-Suite-Logo.png)

Rule #3: Know the fundamentals
The fundamentals are colour, layout and typography. If I know my colour wheel well, I can find the right colour scheme to match the theme of the design. The layout is another word for balance. Without the right layout, everything on the page would be messy and there wouldn't be any direction or focus. A nice logo, good fonts, plenty of space for story and large appropriate images would be an example of a good layout. For good typography, there should be enough space between letters and lines (leading & kerning), consistent formatting throughout and suitable fonts! 

Rule #4: Know your audience
To make the design more appropriate and suitable, knowing the target audience would be best before deciding on the layout. These are some things to consider: Age, education, career, gender, income and hobbies. For example, if the topic was on Lego toys which is targeted to children, the design should be colourful, vibrant and has less words to keep it simple.

These are all that I learnt during that lesson! I will definitely take note of these basic rules.